
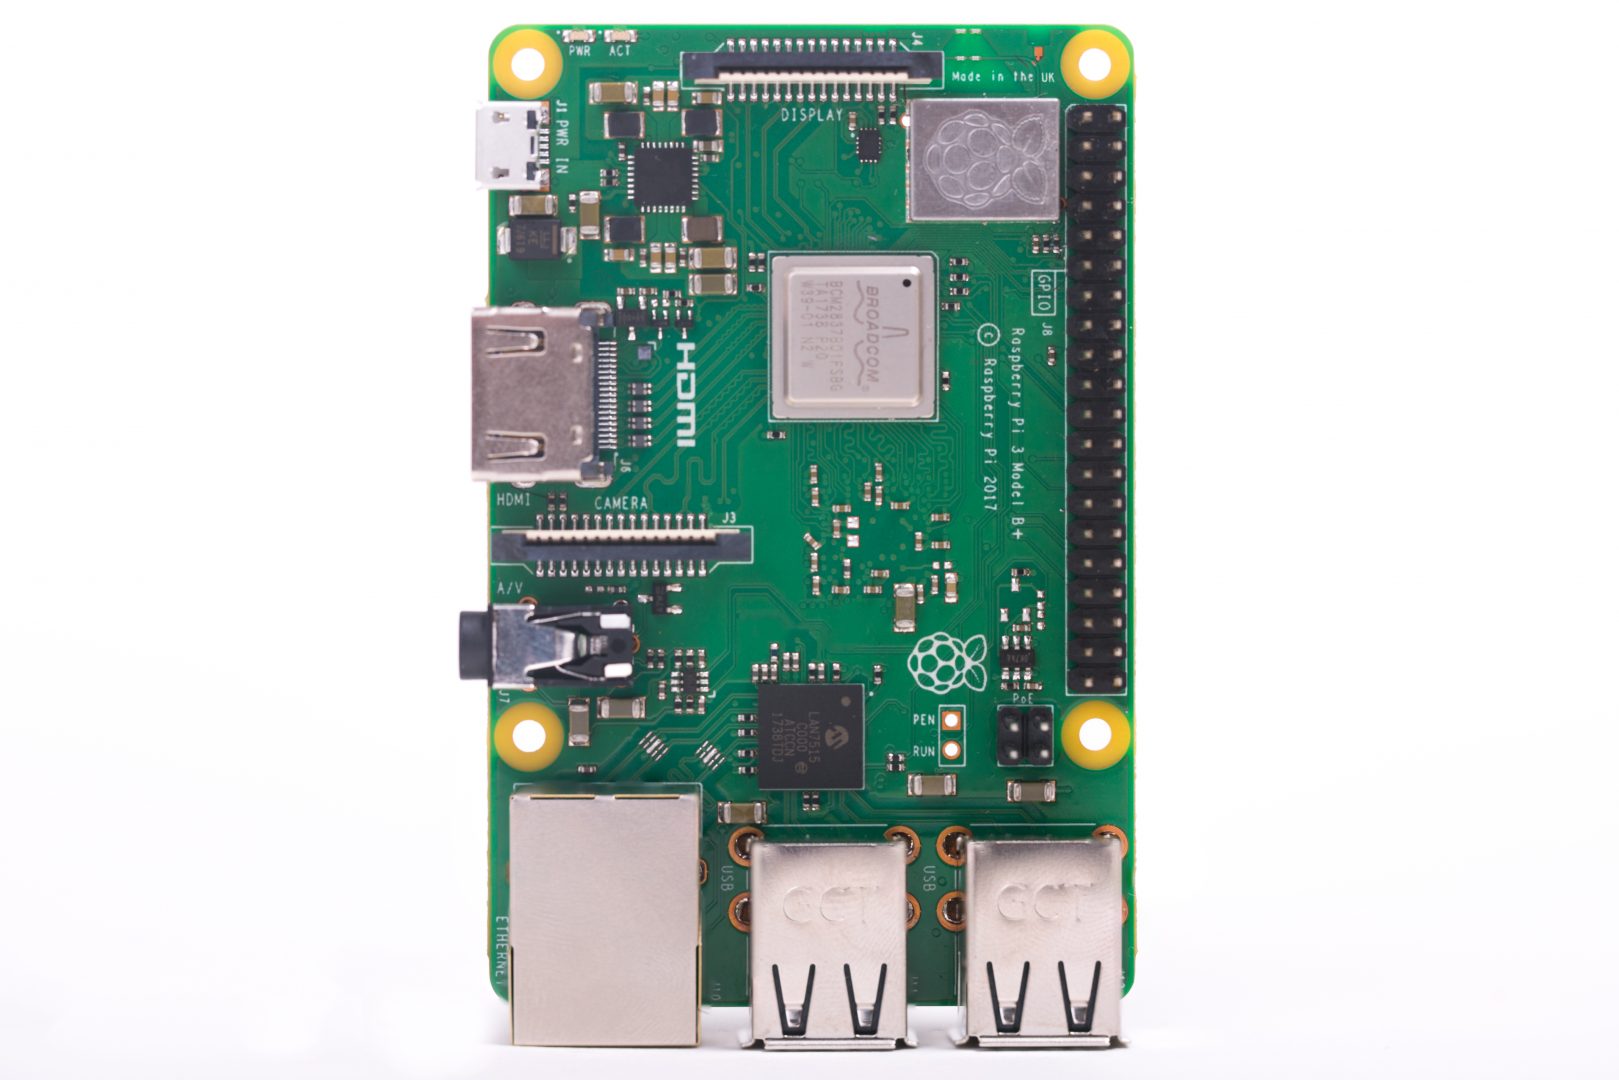
How To Connect To Raspberry Pi SSH Over Internet: A Comprehensive Guide
Connecting to a Raspberry Pi via SSH over the internet is a crucial skill for anyone managing remote devices or working on IoT projects.
Whether you're a hobbyist, developer, or tech enthusiast, the ability to access your Raspberry Pi from anywhere in the world opens up a world of possibilities. With Secure Shell (SSH), you can remotely control your Pi, troubleshoot issues, and even deploy applications without needing physical access to the device. However, setting up SSH over the internet requires careful configuration to ensure security and reliability. This article dives deep into the steps you need to follow to establish a seamless and secure connection, while also addressing common challenges you might encounter along the way. The Raspberry Pi, a versatile and affordable single-board computer, has become a go-to tool for countless projects, from home automation to cloud servers. One of its standout features is the ability to connect remotely via SSH, allowing users to interact with the device’s command line interface from another computer. While SSH connections are typically straightforward on a local network, extending this capability over the internet introduces additional considerations, such as port forwarding, dynamic DNS, and encryption protocols. Understanding these elements is essential for anyone looking to harness the full potential of their Raspberry Pi remotely. In this guide, we will explore the entire process of connecting to your Raspberry Pi SSH over the internet, from initial setup to advanced security measures. You’ll learn how to configure your Pi for remote access, troubleshoot common issues, and ensure your connection remains secure against potential threats. By the end of this article, you’ll have the knowledge and tools to confidently manage your Raspberry Pi from anywhere in the world, empowering you to take your projects to the next level.
Table of Contents
- What is SSH, and Why Use It with Raspberry Pi?
- How to Enable SSH on Your Raspberry Pi?
- Setting Up Port Forwarding for Remote Access
- Is Dynamic DNS Necessary for Connecting Over the Internet?
- How to Secure Your SSH Connection?
- Common Issues When Connecting to Raspberry Pi SSH Over Internet
- Can You Use Third-Party Tools for Easier SSH Access?
- Step-by-Step Guide to Connect to Raspberry Pi SSH Over Internet
- Frequently Asked Questions
What is SSH, and Why Use It with Raspberry Pi?
SSH, or Secure Shell, is a cryptographic network protocol that allows users to securely access and manage a remote device over an unsecured network. It provides a secure channel for communication, encrypting all data exchanged between the client (your computer) and the server (your Raspberry Pi). This encryption ensures that sensitive information, such as login credentials and commands, cannot be intercepted by malicious actors. For Raspberry Pi users, SSH is an invaluable tool because it eliminates the need for a monitor, keyboard, or mouse to interact with the device. Instead, you can control your Pi entirely through a command-line interface from another computer. There are several compelling reasons to use SSH with your Raspberry Pi. First and foremost, it simplifies remote management, especially for projects deployed in locations where physical access is inconvenient or impossible. For instance, if your Raspberry Pi is part of a home automation system tucked away in a closet, SSH allows you to make updates or troubleshoot issues without having to retrieve the device. Additionally, SSH is lightweight and consumes minimal system resources, making it ideal for the Pi’s modest hardware specifications. It also supports automation scripts, enabling you to schedule tasks or execute commands remotely without manual intervention. Another key advantage of SSH is its versatility. Whether you’re running a web server, hosting a media center, or experimenting with IoT applications, SSH provides a consistent and reliable way to interact with your Pi. Moreover, SSH can be used in conjunction with other protocols, such as SFTP (Secure File Transfer Protocol), to transfer files securely between your computer and the Pi. This combination of security, convenience, and functionality makes SSH an indispensable tool for anyone working with a Raspberry Pi.
How to Enable SSH on Your Raspberry Pi?
Enabling SSH on your Raspberry Pi is the first step toward remote access, and it’s a straightforward process. By default, SSH is disabled on most Raspberry Pi operating systems, including Raspberry Pi OS, to enhance security. However, you can easily activate it using either the graphical user interface (GUI) or the command line. If you’re setting up your Pi for the first time, you can enable SSH during the initial configuration process. Alternatively, you can do it later by accessing the Pi’s settings.
- J D Vance Couch Meme
- What Does Trump Signature Look Like
- Fun Facts Dingo
- Kroger Xmas Day Hours
- Sign For June 24
Using the Raspberry Pi Configuration Tool
To enable SSH via the GUI, follow these steps:
- Open the Raspberry Pi desktop environment and navigate to the main menu.
- Go to Preferences > Raspberry Pi Configuration.
- Click on the Interfaces tab.
- Find the SSH option and select Enable.
- Click OK to save your changes and reboot the Pi if prompted.
Using the Command Line
If you prefer the command line or are working on a headless setup (without a monitor), you can enable SSH by executing the following commands:
- Open the terminal on your Raspberry Pi or connect via a direct connection.
- Type
sudo raspi-configand press Enter. - Select Interfacing Options from the menu.
- Choose SSH and confirm that you want to enable it.
- Exit the configuration tool and reboot your Pi.
Alternative Method: Creating an Empty File
For headless setups, another quick way to enable SSH is by creating an empty file named ssh in the boot partition of your Raspberry Pi’s SD card. This method is particularly useful if you don’t have access to a monitor or keyboard:
- Paul Walker Actor Bio
- Who Is Tameka Foster
- Luke Combs Brother Died
- East Village San Diego Bars
- Chesapeake Inn Marina
- Insert the SD card into your computer.
- Navigate to the boot directory.
- Create a new file named
ssh(no extension). - Eject the SD card and insert it back into your Raspberry Pi.
Once SSH is enabled, you can test the connection by using an SSH client like PuTTY (for Windows) or the built-in terminal on macOS and Linux. Simply enter the Pi’s local IP address and log in with your username and password. With SSH enabled, you’re now ready to proceed with configuring remote access over the internet.
Setting Up Port Forwarding for Remote Access
To connect to your Raspberry Pi SSH over the internet, you’ll need to configure port forwarding on your router. Port forwarding allows external devices to communicate with your Raspberry Pi by directing incoming traffic on a specific port to the Pi’s local IP address. By default, SSH uses port 22, but for added security, many users choose to change this to a non-standard port. Regardless of the port number, the process of setting up port forwarding remains largely the same.
Accessing Your Router’s Admin Panel
The first step is to access your router’s admin panel. This is typically done by entering the router’s IP address (often something like 192.168.1.1) into a web browser. You’ll need to log in with your admin credentials, which are usually found on the router itself or in its documentation. Once logged in, navigate to the port forwarding section, which may be labeled as “Port Forwarding,” “NAT,” or “Virtual Servers,” depending on your router’s brand.
Configuring Port Forwarding Rules
Once you’re in the port forwarding section, you’ll need to create a new rule. Here’s how:
- Specify the external port number (e.g., 22 or your custom port).
- Enter the Raspberry Pi’s local IP address.
- Set the internal port to match the external port (e.g., 22).
- Choose the protocol (TCP for SSH).
- Save the rule and restart your router if necessary.
Testing the Configuration
After setting up port forwarding, you should test the connection from an external network. Use an SSH client and enter your public IP address (which you can find by searching “What is my IP” on Google) along with the port number. If everything is configured correctly, you should be able to log in to your Raspberry Pi. If you encounter issues, double-check your router’s settings and ensure that your Pi’s firewall allows incoming SSH connections.
Is Dynamic DNS Necessary for Connecting Over the Internet?
For many users, connecting to Raspberry Pi SSH over the internet involves dealing with a dynamic IP address assigned by their Internet Service Provider (ISP). Unlike static IPs, which remain constant, dynamic IPs can change periodically, making it challenging to maintain a consistent connection to your Pi. This is where Dynamic DNS (DDNS) comes into play. DDNS services map a domain name to your dynamic IP address, ensuring that you can always reach your Raspberry Pi even if the IP changes.
How Dynamic DNS Works
Dynamic DNS works by automatically updating the DNS records whenever your IP address changes. You can set up a DDNS service by creating an account with providers like No-IP, DuckDNS, or Dynu. These services offer free and paid plans, depending on your needs. Once registered, you’ll receive a domain name (e.g., yourname.ddns.net) that points to your Raspberry Pi. The DDNS client software, which you can install on your Pi, periodically checks your public IP address and updates the DNS records accordingly.
Setting Up Dynamic DNS on Raspberry Pi
To set up DDNS on your Raspberry Pi, follow these steps:
- Sign up for a DDNS service and create a hostname.
- Install the DDNS client software on your Pi. For example, use
sudo apt-get install ddclientfor No-IP. - Configure the client by editing its configuration file (e.g.,
/etc/ddclient.conf) with your DDNS credentials and hostname. - Restart the DDNS service to apply the changes.
Benefits of Using Dynamic DNS
Using DDNS eliminates the need to remember or track your changing IP address, simplifying remote access. It also enhances reliability, as you can connect to your Pi using a consistent domain name. Additionally, DDNS is cost-effective compared to purchasing a static IP from your ISP, making it an excellent choice for home users and small projects.
How to Secure Your SSH Connection?
While SSH is inherently secure, there are additional measures you can take to enhance the safety of your Raspberry Pi SSH connection over the internet. A secure setup not only protects your Pi from unauthorized access but also safeguards your data and network. Below are several strategies to fortify your SSH connection and minimize potential vulnerabilities.
Change the Default SSH Port
One of the simplest ways to improve security is to change the default SSH port (22) to a non-standard port. This reduces the risk of automated attacks targeting port 22. To change the port, edit the SSH configuration file on your Raspberry Pi:
- Open the terminal and type
sudo nano /etc/ssh/sshd_config. - Find the line that says
#Port 22and change it to a new port number (e.g., 2222). - Save the file and restart the SSH service using
sudo systemctl restart ssh.
Remember to update your router’s port forwarding rule to reflect the new port.
Disable Password Authentication
Password-based authentication is susceptible to brute-force attacks. Instead, use SSH key pairs for authentication, which are far more secure. Here’s how to set it up:
- Generate an SSH key pair on your local machine using
ssh-keygen. - Copy the public key to your Raspberry Pi using
ssh-copy-id pi@your_pi_ip.
Article Recommendations
- What Happens To Will In Stranger Things
- Northfield Newspaper
- How Old Is Gary Busey The Actor
- Anonymous Celebrity Lawsuit
- Jane Leeves Movies And Tv Shows

Detail Author:
- Name : Dr. Randy DuBuque DDS
- Username : jeramy.crooks
- Email : yesenia.dicki@gislason.org
- Birthdate : 2007-06-04
- Address : 13090 Rodriguez Flat Apt. 602 Torpfurt, MO 94971
- Phone : 1-251-494-6041
- Company : Windler Inc
- Job : Mathematical Science Teacher
- Bio : Enim recusandae voluptatem et odit. Eos aut esse temporibus eos. Nemo qui sit perspiciatis vel deserunt autem laboriosam. Eos vel sit quidem eum praesentium eaque esse quae.
Socials
twitter:
- url : https://twitter.com/eernser
- username : eernser
- bio : Incidunt eaque omnis quod omnis et est sint. Accusantium odio quaerat voluptate dolorum dicta cumque. Dolores reprehenderit molestiae consequuntur et qui.
- followers : 4766
- following : 968
facebook:
- url : https://facebook.com/eulalia_real
- username : eulalia_real
- bio : Ipsa itaque illo id doloribus rerum.
- followers : 4535
- following : 2961
linkedin:
- url : https://linkedin.com/in/ernser2021
- username : ernser2021
- bio : Laudantium aut corporis modi qui.
- followers : 5883
- following : 1368
tiktok:
- url : https://tiktok.com/@eulalia3561
- username : eulalia3561
- bio : Facilis velit ullam vero ut et.
- followers : 6594
- following : 1263
instagram:
- url : https://instagram.com/eulaliaernser
- username : eulaliaernser
- bio : Nemo sit reiciendis quia nobis cum delectus. A voluptas qui enim quos et in nostrum.
- followers : 5850
- following : 2086
